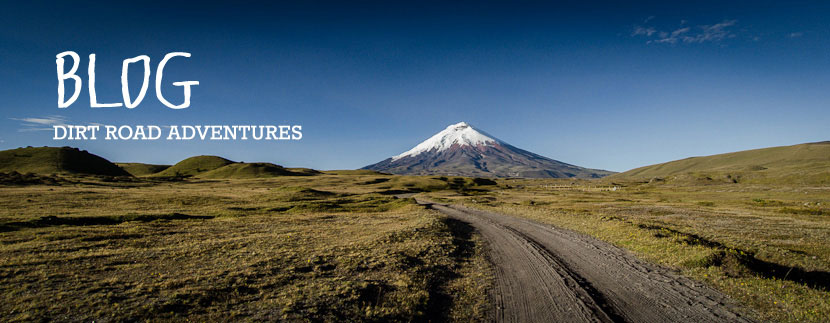
As I ready myself for a short tour, I figured I’d use this opportunity to jot down the gear I tend to carry – for my own recollection as much as general knowledge. I’ve noted a few comments where appropriate, and mentioned upgrades I’m anticipating.
As with all packlists, it’s in no way definitive. It’s what works for me, and takes into account my umbilical chord of electronic gizmos. For now, it’s versatile enough to tide me through frosty nights and toasty days alike. Various items shuffle this way and that, depending on the likes of water hauling – often an issue in the US South West – expected temperatures, the camera I’m carrying and whether I burden myself with a laptop.
Although my setup is hardly minimal compared to the likes of hardened Great Divide racers, I pack lighter than most long distance cycle tourists I meet on the road. Choosing to travel light inevitably involves compromises and works better with some destinations than others. Ultimately, it means deciding where your priorities lie. Do you carry extra food, or ride longer distances? More luxuries, or simpler living? For my part, I streamline gear to make off road travel more enjoyable (and sometimes possible), even if this means forgoing a more comfortable safety blanket in return. There’s a nice knock on effect too: less weight = less wear and tear. And a lighter bike is invariably more fun to ride.
I have a ‘wishlist’ in mind, both gear and places to explore, which I’ll post soon.
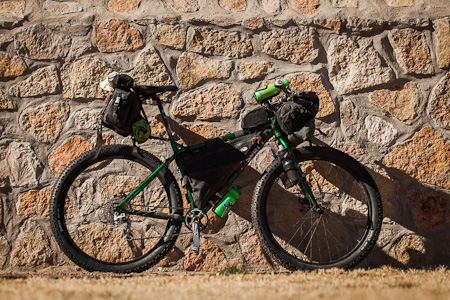
Ready to roll. This is about as lean as I can go for a mixed weather tour, if I want to camp, carry camera gear/a computer and food for a couple of days at a time. If a Point ‘n Shoot and a tablet is enough (or even just a smartphone, or even… film and a paper notebook), then travelling light should pose far less of a challenge. Pictured here is a fairly limited water hauling setup: 4 standard bottles, plus a foldaway water bladder. It would be easier enough to supplement this with larger bottles on the downtube and fork legs.
CLOTHING
1-2 x baggy bike shorts. Sometimes I carry a second 3/4 length pair in lieu of trousers. (The only trousers I like are jeans, and they’re too heavy to haul.)
2 x quick drying boxer shorts. No need for padded shorts these days.
2 x thin Smartwool long sleeve layers, one with a zip.
1 Patagonia synthetic puff jumper for round the camp. I’m coveting the equivalent in down, for extra coziness and packability.
2 x wool socks. One thin, one thick. So I always have something dry.
1 pair of wool ‘ankle warmers’ purchased in Peru. Teamed with wool socks, they plug the missing trouser leg gap.
1 x thermal leggings. I’ve set my eyes on a merino version.
1 x Turtle Fur neck gaitor.
1 cycling t shirt – generally cotton, and cut off. Cotton is comfy but doesn’t wick sweat well – so not to be worn with a backpack. I have a Rapha merino blend cycling jersey I sometimes bring instead. A thin merino T might be ideal.
1 spare t-shirt. For socializing purposes.
1 shirt. On longer tours, donning a shirt is an effective ploy for negotiating officialdom (applying for visas, border crossings etc…). A collar goes a long way.
Bike gloves. Mitts if it’s warm, long fingered otherwise. I find mitts more practical for using a camera.
Seirus Xtreme softshell waterproof glove. I don’t tend to suffer from especially cold fingers, so these do fine for me. If it’s especially frosty, I’ll supplement them with some mitt shells.
Sunglasses. Mine are Sunclouds. $50, with comparable optics to pricier sister company Smith.
Keen Bryce WP Hiking. I’m experimenting with platform pedals at the moment, otherwise, I’d be tempted by Specialized’s Tahoe Sport.
Wool bobble hat. Fits under my helmet.
Buff. Multi-use, nice under a helmet in the morning, or across the face in dusty conditions.
3/4 length Endura waterproof trousers. I prefer 3/4 over full length. I don’t overheat and they cover the parts that need protecting. When it’s been particularly snowy or wet, I’ve worn short gaiters too.
Patagonia shell.
Fake Crocs for campsite lounging. Or, Merrell Barefoot Trail Gloves for hiking and running.
Giro Reverb bike helmet.
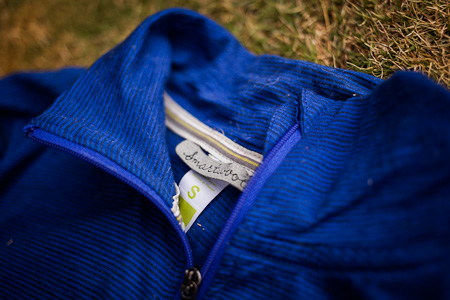
No Smell Smartwool.
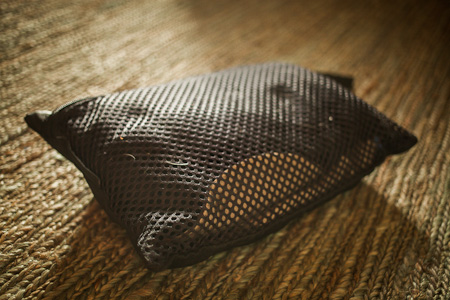
Most of my clothes – doubling up as a comfy pillow too.

Well-stickered Giro Reverb helmet.
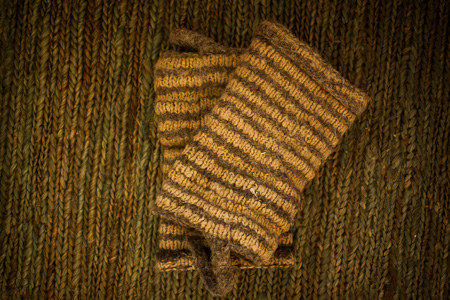
Peruvian ankle warmers. Don’t leave home without them.
SLEEPING
Vango Venom 300 sleeping bag. Not the warmest, but it’s what I have right now. A Western Mountaineering bag is on my wishlist.
Vapour Barrier Liner. Packs tiny, yet boosts the efficacy of my sleeping bag for light winter use. Rivendell have a new one in stock for $25.
Old 3/4 length Thermarest. Not as comfy as the Neo Airs, but quick to inflate and works well enough. Due for an update.
Tarptent Moment. Light and freestanding – but not so packable.
Tyvek groundsheet. Cheap and very light.
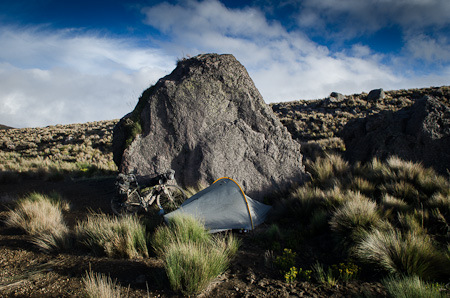
Tarptent Moment. A minimal, single skin, freestanding design. Best suited to sheltered pitching. Vapour barrier: superlight, just a little crinkly.
COOKING
Trangia/Cliksand denatured alcohol stove and support
.9L Evernew titianium pot
1 x ti Snowpeak spork
Fold-flat camping bowl. Doubles as cutting board.
1 x lighter
1 x spare matches
Penknife with blade and can opener.
Hydrapak 2.5l water bladder
Large zip lock bags for food storage.
Bottle of iodine drops or packet of purification tabs. I generally drink local water, so rarely have needed a water filter – though the SteriPEN Freedom would be ideal otherwise.
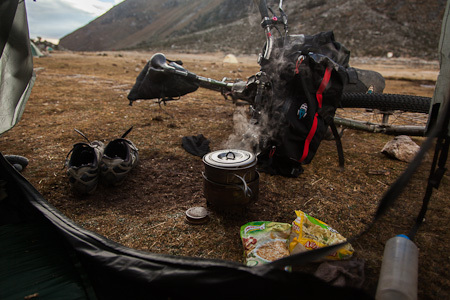
A denatured alcohol stove is simple to run and the fuel is safe to stow in plastic bottles. Don’t be in a rush though, as it’s slower to boil water than a multi-fuel system. But much quieter.
WASH BAG
Toothbrush and toothpaste
Suncream
Small bottle of tea tree oil
Dr Bronner’s peppermint soap, 59ml bottle.
Bottle of iodine. Good for cuts, and for purifying water.
Some ibuprofen. Just in case.
Nail clippers
Scissors for beard trimming
My medicine cabinet is pretty light. Most places I tour – Asia and Latin America – has everything readily and cheaply available, over the counter. I’m prone to chest infections, so I sometimes carry some chinese medicine for that, and amoxycillin if things get really bad. Duct tape doubles up well for sealing deep gashes.
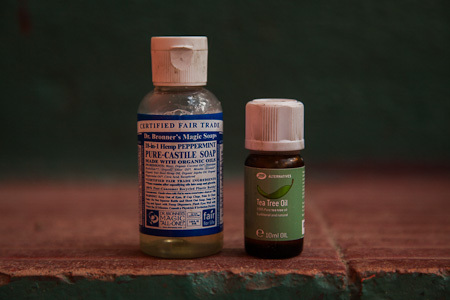
Tea tree and Dr Bronner. All you need for personal hygiene.
PARAPHERNALIA
Travel documents. Plus photocopies, particularly visa entry stamps. Backups are photographed and stored online too.
Maps
Notebook and pen
Printed photos. Good ice-breakers in far-flung destinations.
Abus Combiflex cable lock. Very light. An immobiliser rather than a secure means of locking my bike. When I’m not camping, the bike comes with me into a guesthouse room.
Junk strap. In case any buckles break.

A stout, heavy is a prerequisite for living in any industrialised city, but I’ve never needed one while touring. This cable lock is enough to immobilise my bike for a few minutes in most parts of the world. At night, I sometimes secure my bike to my tent so I’ll be awoken if anyone tries to make off with it.
ELECTRONICS
(Although there’s a real appeal in a simple, decent quality Point ‘n Shoot, I enjoy a bit more creative control with my photography, and have invested in good quality lenses over the years. I alternate regularly between two camera setups. The first mirrorless option is light and compact, pretty much ideal for bikepacking. The second DSLR option is bulky and heavy but offers better IQ and in my case, lens variety – based on what I already own.)
Either:
Panasonic GH2. 14-45mm f/3.5-6.6 lens (28-90mm equiv), 20mm f/1.7 (40mm equiv) prime and 45-200mm f/4-5.6 (90-400mm equiv). Discreet, small and light. I miss fast lenses for depth of field control, plus the lack of wide angle.
Or:
Canon 5D Mk2. 17-40mm (f/4), 70-200mm (f/4) and 40mm prime (f/2.8). Fantastic low light quality, depth of field control and battery life. Extremely unpractical size and weight.
(I’ve long used a Nikon D300, but after years of sterling service, it has finally bit the dust, as did my trusty 17-55mm (f/2.8). Although I prefer my Nikon, it worked out more economical for me to buy an unexpectedly cheap 2nd hand Canon 5D Mk2, now that it has been superseded by the Mk3. I already owned a couple of nice Canon lenses.
Eventually, I plan to sell my DSLR gear and invest in something like an Olympus OM-D. My dream lens lineup would thus stand as follows: Olympus 9-18mm (18-36mm equiv), Olympus 12mm f/2 (24mm equiv), Lumix 20mm f/1.7 (40mm equiv) and Lumix 35-100mm f/2.8 (700-200mm). This setup would offer the variety and most of the optical quality of the Canon/Nikon, without the ridiculous heft – despite the number of lenses. It’s a significant investment though. That’s one advantage of established DLSR brands like Canon and Nikon – cheap second hand gear is easy to find.)
Spare battery.
Spare CF or SD cards.
Card reader and extra short USB cable.
Lens wipe and Giotto Air Rocket Blower.
iPhone 5, plus cable. Wifi, music, Googlemaps, backup camera, guidebooks and a whole lot more.
iPod Shuffle, in-ear headphones and X-Mini 2 speaker. I like my music.
Garmin eTrex 20 when needed.
Spot Tracker when needed.
Mac Air 11in. Svelte, light and amply powerful for photo editing. Homemade padded case.
WD My Passport 1TB. A reliable hard drive for backups, stored in water tight zip lock bag and padded sleeve. I choose my favourite shots and back these up onto a 32GB flash drive, hidden in my framebag, sending copies home when possible or uploading to Drop Box.
Petzl head torch and rear bike LED.
(All my fancy electronic gear is masked with electric tape for both protection and a worn in, logo-free look.)
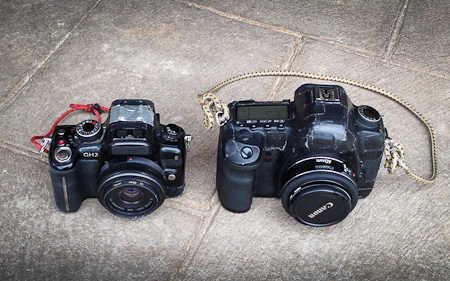
Lumix GH2 with 40mm (equiv) f/1.7 v Canon 5D Mk2 with 40mm f/2.8. Taken with an iPhone 5.
11in Macbook Air. A 1.08kg powerhouse.
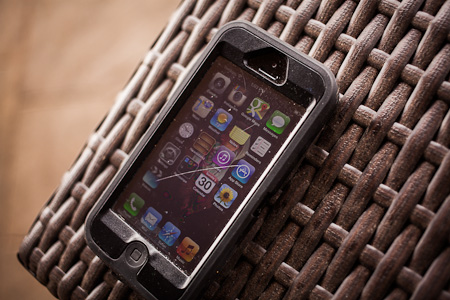
iPhone 5, keeper of music, emails and guidebooks. Plus, a backups camera, dictionary , notebook, and many more things besides. Protected by an Otterbox Defender.
SPARES/TOOLS
2 x 29” tubes w/removable cores, Topeak multitool w/chainbreaker, Leatherman Squirt (includes pliers and scissors), 2 x water cage bolts, chainring nut and bolt, spare SPD cleat and bolts, tire boot material, patch kit, extra patches, tyre lever, gear cable, brake cable, 2 sets of BB7 brake pads, Fiber Fix spoke, 1 spare spoke of each length, around 6 extra chain links and 2 extra Sram Powerlinks, a few zip ties, Gorilla tape wrapped around pump, Topeak Master Blaster pump. Small bottle of lube. Rag.
(If I’m using my Rohloff, I carry 2 spare Rohloff torx bolts, a TX20 key and a Rohloff sprocket removal tool. I’ll also pre-cut 2 gear cables to the correct length and dab the ends with superglue, to save sourcing a high quality cable cutter.)
1 x emergency tyre for longer trips or extended road sections. The light, folding Marathon Dureme 29 x 2 is perfect.
The Bagman 2 Expedition offers some handy additional storage space, perfect for a spare tyre.
PACKING
Porcelain Rocket custom frame bag. A key component to travelling without panniers, especially if you have a large frame.
Porcelain Rocket top tube pack. Perfect for a multitool and snacks.
Porcelain Rocket front handlebar roll bag. Within, a 10L Outdoor Research waterproof roll bag keeps things dry.
Porcelain Rocket front pouch or Ortlieb bar bag. I’m still dissatisfied with how I pack my camera. An Ortlieb bar bag offers the best monsoonal protection and is easiest to quickly remove from the bike, but it’s bulky and tends to encourage the camera to rattle around over bumpy descends. If I’m using my M4/3 setup, a Porcelain Rocket front pouch works fine, supplemented with a small dry bag when needed.
Carradice Super C saddlebag. I’ve been happily using a Porcelain Rocket seat pack for a while, but I’m currently experimenting once more with a traditional saddlebag, supported by a Bagman 2 Expedition. This setup fits my laptop, without the need to carry panniers or a backpack. The downside is that the Carradice/rack combo is considerably heavier, and isn’t quite as stable – some modifications may be needed eventually.
REI Flash 18. Rolled up while touring. Good for around town, day rides, or to tide me over if extra food is required.
Profile Kage bottle cages. Light, strong and grippy.
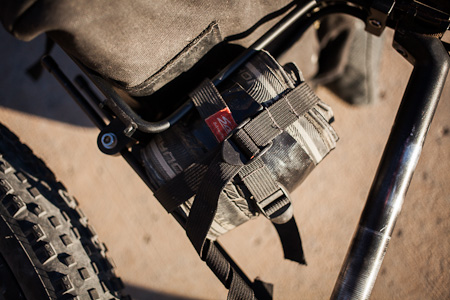
Ti Triple bolt King Cage. Holds a 1.2L Kleen Kanteen bottle snuggly.
King Cage Top Cap Cage Mount. If extra H20 is required.
(The Surly Ogre I have been riding includes eyelets on the fork for extra water bottle cages. This has become a valued part of my setup. When these are lacking, I use hose clamps.)
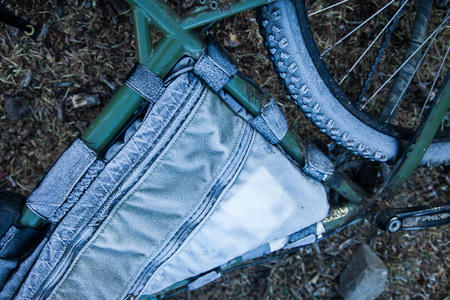
A framebag makes great use of centre space, particularly for large frames, and is a key component in pannier-less travel. I use it mainly for food and if needed, a spare camera lens.
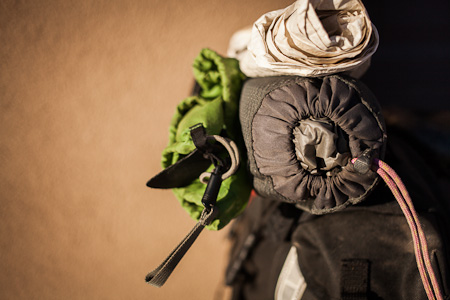
Moment tent, Tyvek groundsheet and REI Flash 18 atop a Carradice saddlebag.
LONG HAUL
The setup I run reflects the fact that I like to ride backcountry dirt roads, and even singletrack where possible. My gear is distributed across the bike and is relatively light.
However, it only realistically allows me 2-3 days of food, unless I wear a backpack – which I prefer to avoid. Generally this has proved to be ample, but there are times when the ability to carry more cargo is preferred.
If I’m anticipating riding longer distances between re-supplies, I have the option of fitting a rear rack and two small panniers, or puling a trailer. I tend to prefer the latter, despite the extra hardware involved and the associated logistical challenges it can sometimes pose. A single wheel trailer – my favourite is Tout Terrain’s Mule – gives me the capacity to carry ample food and share the payload with a cycling partner. It saves wear and tear on tyres and wheels, and keeps the bike fun and spritely to ride on mountain biking day trips. It’s also especially easy to pack. The Mule handles nicely and I particularly like its kickstand.
I generally team it with a framebag for easy access to snacks/layers/camera lenses and an Ortlieb bar bag. I still pack my soft bikepacking gear for ultralight, mountain biking detours.
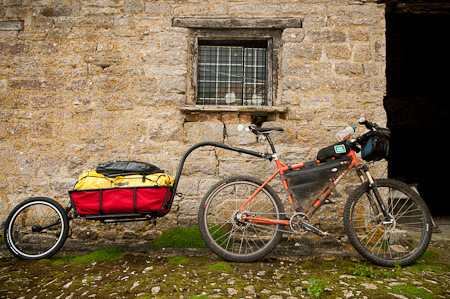
Panniers or trailers? If you tour and like mountain biking en route, Tout Terrain’s Mule is a great option for times when more gear capacity is needed. Works nicely for doing the groceries back home too.
Handy links:
A previous post I wrote on travelling Lean and Light.
Joe’s multi-month ultra minimal South American packlist. Yes, it can be done!
Gary’s setup is considerably lighter than mine; some useful notes on tubeless touring.
Scott’s video packlist.
Gypsy by Trade, a proponent of saddlebag bikepacking.
Round the world record holder Mike Hall and his setup.
Travel too light and you’ll probably end up doing nonsense like this…

Looks like you’re ready to go!have a great ride.
Just shifting a lingering cough and cold, then I’m off!
I wish I could whittle things down so low. I suffer from cold hands and feet so I always seem to have half a pack full of gloves and overshoes alone.
Patagonia down jumpers are wonderful in cold dry weather, so cosy. Cass, I live quite close to a Patagonia Outlet, and they often have clearance/seconds sales for winter down kit in the Spring – I got mine for 45 euro (about $60). Let me know the size/colour/style you want and I’ll keep an eye out for a bargain one if you like.
$60 sounds much better than the $230+ it generally comes out to in REI. I’ll try some on and let you know! I’m not in a rush, so springtime would be just fine.
For the most part, I admire Patagonia as a company. I guess if you do end up paying full price, you can console yourself with the fact that they’re part of the 1% for the planet group, and they’re far more honest than most about their eco footprint:
http://www.patagonia.com/us/footprint/
On the other hand, Planet Bike give $25 per cent of their profits to bike advocacy!
http://www.planetbike.com/page/grassroots/
Hi Cass, I’m intregued by the DSLR strap, is that a bungy cord? I’ll give that a try. My latest discovery, I thought you might like , light no fluoride lasts ages and works great, http://www.amazon.com/Toothpowder-Daily-Care-Mint-Ounces/dp/B0006ON9NA
It’s climbing cord, maybe 4mm but I can’t remember. I never hang a camera round my neck, so it’s just as a safety precaution rather than for comfort. It packs down much smaller. Likewise, on my M4/3, I use a thinner cord that I can wrap round my wrist.
I’ve come across toothpowder before but never tried it. I see it comes in little 2oz bottles too, which is great. I’ll have to give some a whirl.
Inspirational as always….Thanks. Have a great 2013!
Cass, I’m always concerned when carrying camera gear on a rigid bike as opposed to carrying it in a back pack where trail shock is no worry. Do you think this is a valid concern; I’d much rather prefer riding without a backpack? Thanks for this informative post.
Hi Dirk,
Here’s some convoluted thoughts – all geared towards off road travel rather than pavement.
I agree that a backpack is the best place for a camera in terms of protection – when I ride routes like the AZT, which has loads of rocky terrain – that’s where it lives. And when I hop off the bike for a picture – which might involve a quick scramble to get to the right vantage point – it’s nice to have my camera with me without pulling it out of a bar bag.
But… I really don’t like a heavy pack for anything other than these kinds of rides, where I’m moving around on the bike all day. And even then, I can’t say I love it.
From my experience, a M4/3 fares better at living in a front pouch, as it’s small enough to really bundle up. I’ve never had a M4/3 camera fail. Maybe not having a mirror – hence less moving parts – helps too. The front pouch sits against my roll bag, stuffed sleeping bag and clothes, which helps protect it further.
As I mentioned earlier, a bar bag like an Ortlieb is so practical in many ways – really quick to access, easy to unclip and carry with you into restaurant or shop, and completely waterproof. The downside is stuff rattling around off road: I use a padded Ortlieb insert, but really need to fill the gap with a piece of clothing too.
It’s hard to know for sure, but suspension definitely feels like it helps, but handling-wise, I’m not crazy about DLSR weights on a handlebar with a fork that’s not rigid.
I’m not sure that there’s really an ideal solution. For this reason, I think a smaller, high end mirrorless camera, like a M4/3, Fuji or Nex is ultimately the best solution – a camera that’s more easily bundled when the goings gets really rough.
Just recently, I’ve been experimenting with a little Camelbak waistpack I picked up second hand. I can’t way I like a lot of weight round my belly when I ride, but for a light camera, it could be a good solution. It keeps it protected, it’s light, it’s always with you, and doesn’t make for a sweaty and sore back.
In terms of rigid 26 x rigid 29, I’d say that 29er tyres roller better than 26 inchers, and afford a little more scope for running lower front tyre pressures (even more so in the case of the Krampus!) – which perhaps takes a little of the sting from the ride. But in terms of protecting camera gear, I’m not sure if the difference is that significant.
Thanks Cass. The less bulky camera setup has my vote; I find I’m taking more pics with a point & shoot due to easy + quick unpack/pack. Your climbing chord strap is a cool idea. Enjoy the trip.
Waistpacks are really nice. Recently bought one to have my camera/tools with me when riding without bags and stuff. I went for the Black Diamond Fuse Lumbar Pack which sports another two flexible pockets at the sides for mobile/tools, a bigger one for the camera/snacks and two stowable bottle carriers (there’s a “tunnel” between belt and the larger bag where one can tuck them in). It’s got a quite big and stable belt but not uncomfortable for riding. Actually I didn’t realise wearing it at all. And in cold or windy environment it serves as a nice kidney warmer (don’t know if that’s the correct english word ..). Best investment I did for a long time!
That looks like a nice pack, with a wide, non-belly-digging waistband. Thanks for pointing it out to me. My Camelbak was just a few dollars in REI’s Scratch and Dent sale, so a chance to dabble. I’ll definitely be experimenting further.
Fuji’s range of large sensor, high end point and shoot and interchangeable mirrorless cameras is getting more and more impressive. I’ve never had a chance to try any. The XE1 looks particularly interesting to me. Unfortunately, there’s no decent camera shops where I’m living, so no opportunities to see how it feels.
Oh, it’s an Fujifilm X10 .. just for the size. Fit’s well inside. In addition, due to the bigger belt, the pack or it’s contents don’t jump or bounce around.
I just got a Nikon V1 on sale. I read about all the glitches with the interface and controls so I was expecting them, and therefore not disappointed. It’s true, it’s hard to hold the thing without some setting being accidentally switched but once you get to know it it seems workable, and a great little camera for the money. The lenses are very good. I have also heard rumours that many more N1 models will soon become available, and I’m sure we’ll also get a wide angle and longer lenses. Since sensor performance only gets better with time, I think I will go with this system for general photography.
But I also like wildlife photography and the crop factor on this camera makes my 300 AF-S f/4 pretty good, but only in good light. I think I will stick with the DX format for that, maybe get a D400 when that comes out. That big honking setup (D400 + 300 AF-S f/4) would be my one extravagance.
The little V1 got such a mixed press when it came out, but I’ve read so much good stuff about it from people who actually own one, and picture quality and creativity I’ve seen has been really impressive. Look forward to hearing how you get on with it.
For me, the reasons for DX/Crop is dwindling as M4/3 closes the gap. I can see how it offers extra reach for wildlife photography, without the need for a massive lens, and is still better for sports stuff.
But if you still want a DLSR for bike travel (and were starting from scratch), I kind of feel you’re better off with one of the more ‘compact’ full frames, like a Nikon D600. At least that way you offset the penalty of its weight and bulk with incredible low light and dynamic range, still a noticeable jump up from M4/3.
Of course, I say this without ever having tried an OM-D, D600, J1 etc etc…
Cass, I’m curious, how cool/comfortable is the Giro Reverb on a really hot day?
I find it fine – though I tend to ride in cooler temps. It’s super light, which I like, and I prefer the non-techy aesthetics. The retention system isn’t as secure and adjustable as most high end lids, so it’s not particularly suited to mountain biking. I got it in a sale, and for the price, I’ve been happy with it.
Try adding some Propolis Cream to your kit, it’s great for all types of rashes and skin annoyances, especially in the scranus area. Also you can brush your teeth with the Dr. Bronners!
Thanks for that. I’ll check it out. I hadn’t heard of it – sure seems to pack in a lot of goodness.
Dr Bronner as toothpaste is one step too far for me (-;
At one time you were using the Lumix GF1. did it fall out of favor with you and if so why?
Hi John,
I did indeed trade in my GF1 for a GH2. In hindsight, I think I prefer the GF1, for the build quality and the colours.
I went for the GH2 for a more practical viewfinder, mainly, and a few extra function controls. I really like the way it flips from electronic viewfinder to screen with the eyepiece sensor. I had to manually change it over on the GF1, and the awkwardly shaped add-one viewfinder tended to get trapped within my bag and felt flimsy.
On the other hand, the GH2 feels plasticky in comparison to the GF1. I hear the GH3 is much more solidly built, but a lot bigger. The OM-D sounds like the ideal in between.
I’ve been a reader for awhile and I wanted to say that I appreciate your writing and especially your pictures. I now want to go to Peru 🙂
Thanks in particular for this very helpful post.
Thanks Max.
I hope the list is useful. It’s always each to their own, but it’s interesting to read what people pack.
Cass, curiosity has got the better of me. Do you use a graduated filter for some of your shots? If so, how do you carry/protect it?
Hey Alex,
I don’t use any physical graduated filters. I’m a big fan of Lightroom though.
Basically, I have a couple of colour correction presets I’ve made up, which I run through my raw photos. That helps to give them a uniform ‘look’. If the sky has become washed out, I use the graduated filter tool to bring it back. You can make it as subtle or dramatic as you like.
I don’t use Photoshop, as I find Lightroom has everything I need, and is really quick to use. Less time in front of the computer… more time on the bike (-:
Thanks Cass, curiosity satisfied. Lightroom is indeed magical! I only found the blog relatively recently, but it’s been great seeing how you’ve improved over the years. Keep it up!
Pingback: Bike-packing Basics | Bowlingbybike
Quick ?….
Is that a special water bottle cage for the stem? If so, where? If not, what is your setup)
It’s a King Cage stem mount for a water bottle cage.