I’m still in Huaraz, craving to get back on the road… Unfortunately though, the pain in my back has flared up, so I’m having to delay longer. In the meantime, here’s one of a few reviews I’d intended to post before setting of to Peru.
Disclosure: I was sent this Pack ‘n Pedal rack and pannier by Thule via Bike Bag Shop (of which I’m affiliate) to try out. Generally I request gear I’m eager to take away travelling, or I try and finagle a discount, or end up buying it at full retail. But the guys at Bike Bag Shop thought it would be right up my street, so sent a set to Santa Fe for me to try out.
And it’s true, I’ve long been interested in these racks – back when they were called Freeload and based out of New Zealand, before the design was acquired by car rack giants Thule (who, incidentally, own Chariot trailers too). Nowadays, I tend to see lightweight framebags and softbags as ideal for mountain bike touring – but there are times when the capacity of racks and panniers are better suited to the job at hand.
Versatility
So what’s the big deal with Thule’s gear? Well, the main appeal is that one rack provides an adaptable solution for all manner of styles and materials – from full suspension to carbon, 26in or 29in – and of any frame size too. The same rack can even be fitted at the front or back. As such, it can be moved from bike to bike with relative ease – making the system an appealing gateway into touring and commuting. Clearances are very good, though unfortunately a touch too tight for my 29+ Krampus – and hence a fat bike too.
Stability
As with any system that offers such versatility, there’s bound to be compromises. In terms of stability, the racks are considerably better than you might expect. But although the nifty ratchet system cranks down tight, there’s still more side to side play then there would be with a traditional triangulated rack attached with bolts. To handle the quoted 25kg top load capacity, they’re supposed to be tightened down to 15 Nm, but seeing as I don’t have a torque wrench, I just cranked them down as tight as the hex key would let me go – and the rack felt relatively stable. I expect there’d be some scuffing of paint over time, but details like that have never bothered – it’s the same with framebags.
As for panniers, there’s a whole range on offer – geared towards touring and commuting – I particularly liked the look of the Tote Bag for shopping. As it was, I tried a Small Adventure Touring Pannier (16L), sold singly. Compared to the competition, price and weight are definitely up there. At $100 and 2.3lb (1043g) a piece, these are neither light nor cheap panniers in any way. By comparison, the equivalent Ortliebs (Front Roller Plus) weighs 1140g for a pair, and cost $153 for two. Still, some nifty features help offset those extra grams and dollars, which are explained below.
Incidentally, there are two versions of the rack – the Tour and Sport. I tried the Tour ($100, 1kg), which includes rails for mounting panniers. The Sport ($90, 0.8kg) is effectively a platform for cinching on a roll bag or similar – without the rails, it’s also 200g lighter. The Sport may well be the better option for bikepacking.
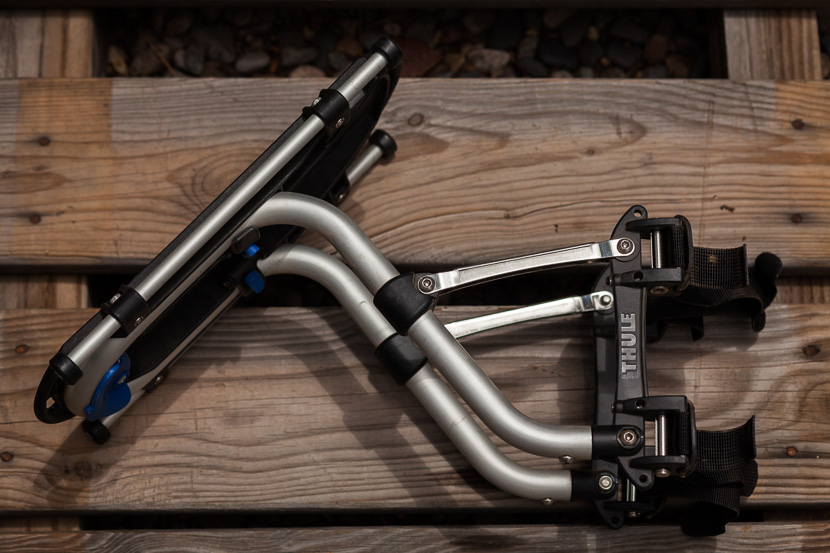
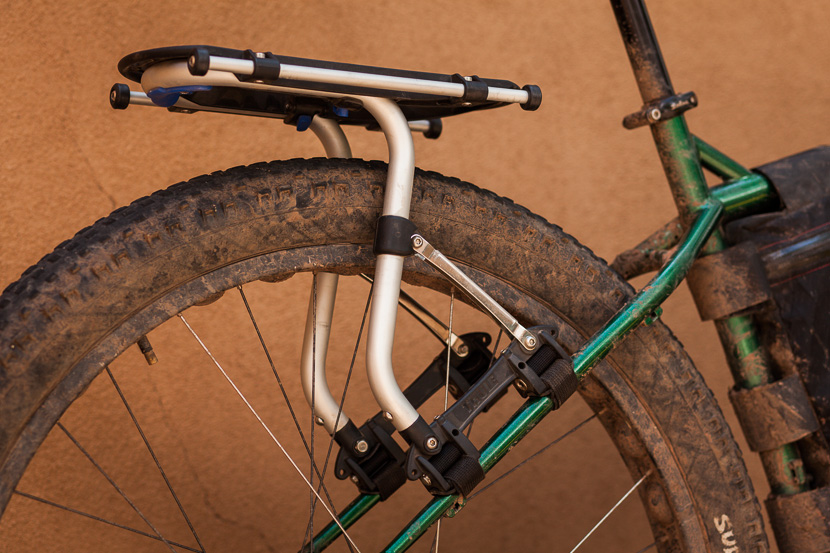
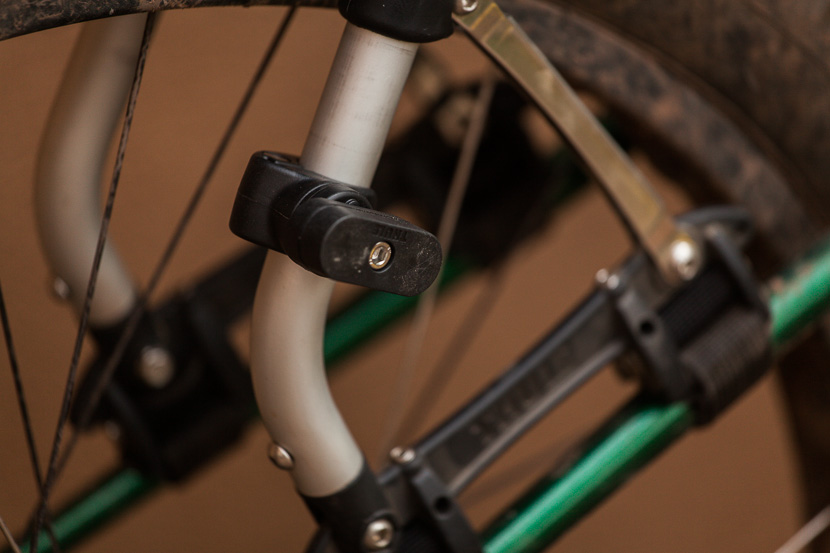
The Thule Tour Rack some with struts of differing lengths, suiting different frame styles and sizes – or whether it’s run at the front or the back.
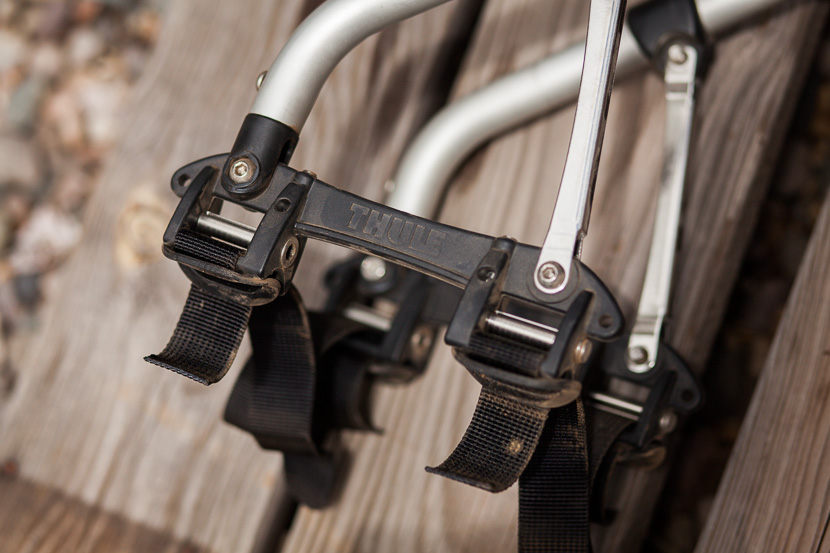
The ratchet system uses a ball ended allen key to clamp it down nice and tight. The supplied key (don’t loose it!) releases the spring, and allows the straps to then be unwound. After some time being attached to my frame, the rack took a little jiggling around to remove it – but as long as you don’t lose the precious key that releases the ratchet mechanisms, it comes off eventually.
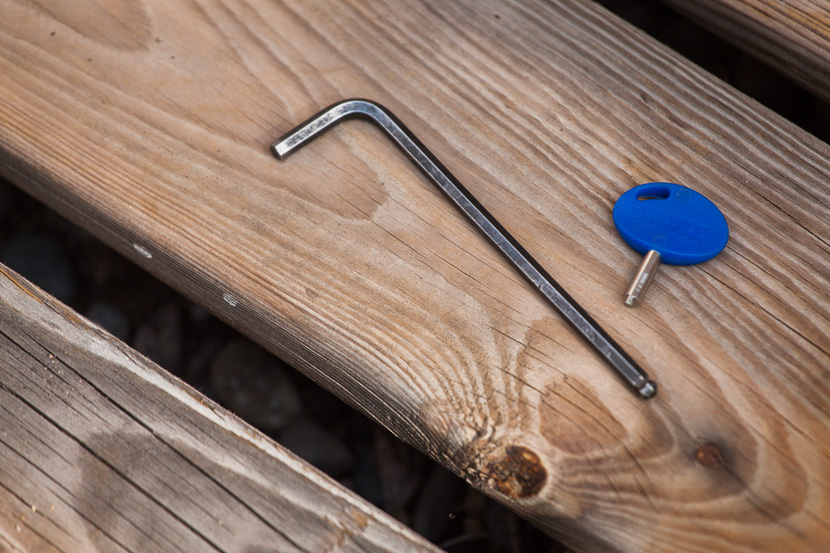
Do not misplace. Tools needed to fit (and remove) the pannier.
Particularly nifty is the mounting system…
… which flips away like a secret door… It makes carrying the pannier, with the supplied strap, a lot more comfortable. My only real qualm is the extra weight for touring.
As well as the length of the struts, their position can also be adjusted, so the rack sits parallel to the ground, whatever frame you’re running. Despite all the plastic, I’ve not experienced any rigidity issues with moderate loads, even on dirt roads. Note: clearances are too tight for a 3in tyre, but ample for anything else.
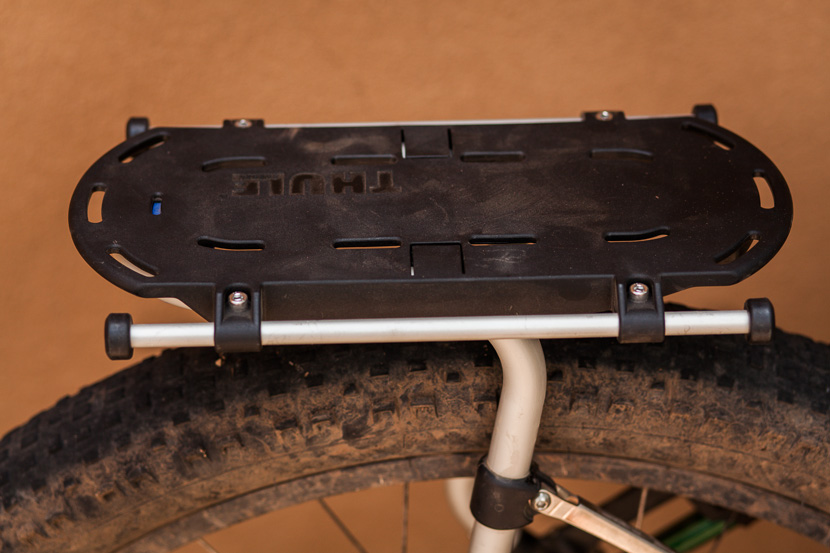
The top deck has loads of slots for strapping on bits and pieces.
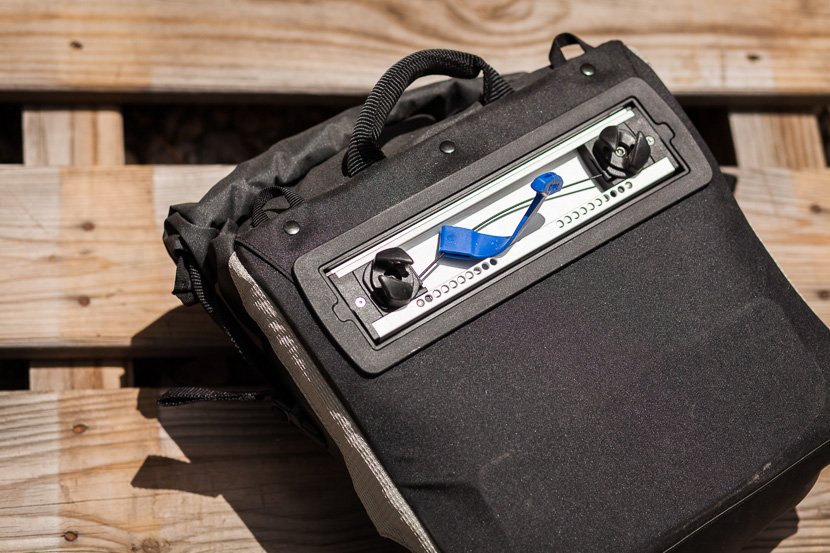
A strong magnet attached to each side of the rack, holding the pannier in place. In use, it’s proved sufficiently tenacious.
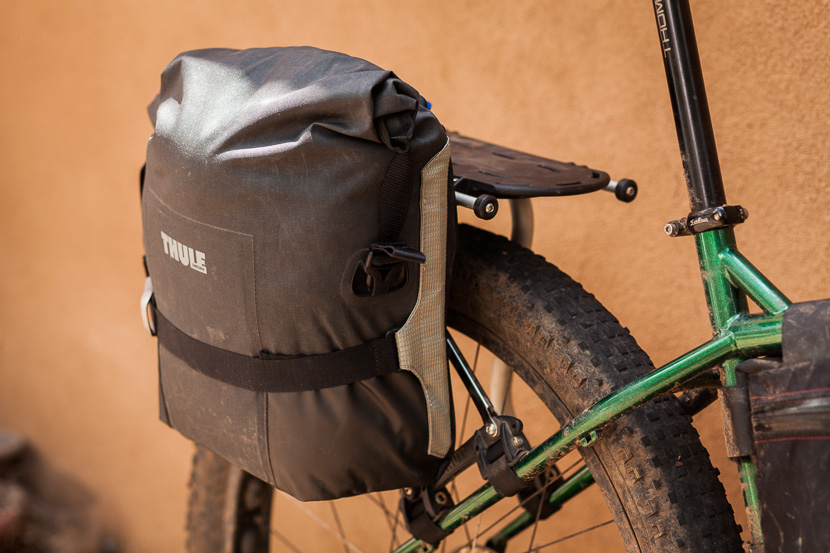
Elegant. The panniers are very easy to mount, snapping into place with the magnet – which is strong enough to hold them in place over most terrain. And neatly, even if the panniers do flap around, they soon snap back into position. Note though that the attachment system sits well below the top of the pannier, making it awkward to run a roll bag across them, as many tourers like to do. My time has been fairly limited with the system, and given that I only had one pannier to play with, loading capacity has been a touch one-side too – though with one of the extra side frames, I could have balanced it out with a standard pannier.
Thule calls the pannier material waterproof but also offers optional covers. I’ve not had the opportunity to ride with them in prolonged rain, but I take existence of covers to mean the panniers aren’t monsoon proof – and that water will eventually soak its way through.On the plus side, this means they’re breathable – and gear is less likely to get stinky inside. However, it also means you’ll need the extra raincovers in the event of a prolonged downpour, especially if you’re carrying the likes of a laptop – in which case, expect to fork out an additional $15 per pannier. And while the roll top closure works nicely when the bag is packed, it does have a tendency to unfurl when it’s half full.
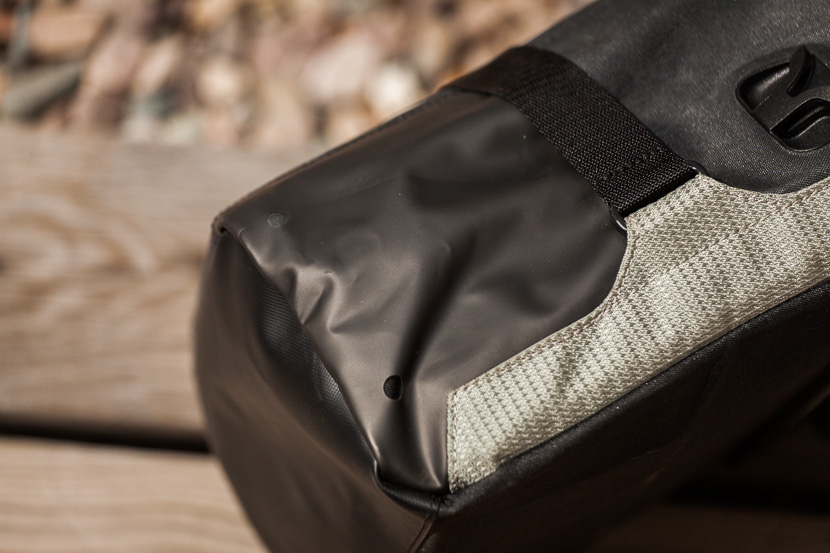
The panniers are very nicely made. The Adventure (Small) has a cross strap to cinch it in, but it’s devoid of any inner or outer compartments. What it does feature, however, is a side pouch designed for an LED, allowing the light to shine through. Although the sleeve muffles the light a little, it’s a nice idea – perhaps a slightly clearer material would be better though.
Versatility: the name of the game
So what’s my overall take on the system? All in, it’s a pretty techy setup, and I have to admit to being a little sceptical initially about stiffness and durability – given all the plastic. But it’s definitely grown on me, and there’s some neat ideas for sure.
As far as I can see, it’s a cargo-carrying solution that’s best suited to commuting and general, mid-weight touring – dirt roads included.
Really, the strength of the Pack ‘n Pedal in its versatility. Lash on a rollbag. Use panniers. Move it from your road frame to your suspension rig. Swap it from a 26in bike to a 29er. Fit it to a friend’s smaller bike. And, although I see it being of greater benefit to commuters than tourers, I like the fact that Thule are striving to create a practical solution off the bike – the fold-away pannier mounts are really nicely executed. I would, however, prefer these panniers to be 100% waterproof, given the roll top closure – and their price tag.
With the advent of ultralight soft framebags and matching seat and rollbags, a lot of mountain bikers might find a rackless setup is a better way to go for lightweight, mountain bike touring. But if you do want the extra space of a more traditional setup on your full suspension rig, then the Pack ‘n Pedal racks and panniers are certainly one way of doing it. For multi-month endeavours, I’d still stick with a more specific chromoly rack system though, assuming you’re riding a bike that’s designed for the task at hand.
Normally, I strive to take gear away on a trip before writing about it, but this wasn’t possible with the Pack ‘n Pedal – partly because I only had one pannier to play with, and also because I only had a couple of months to use it. If you have any longterm, hands-on experience with this system, please post your thoughts below. And if you have any questions, let me know!
There’s some interesting feedback here, of a more extreme nature. But it sounds like there may have been some user error involved too.

What a great article you have written. I can concur that the waterproof material needs a bit more clarity. From one of the conversations I can remember I had a couple of months ago with Thule they mentioned that the materials have ratings and I think they where 4+ different ones. They previously used 3 where if applicable the zippers being 4. And with this new material it would be rated 2. Which is the second most waterproof material technology could provide while being breathable. Gore-Tex being number 1.
Hi, great review, thanks. I’m just finishing a 5 months trip through the Andes of Southamerica and have been using a Sport version on the front and a Tour version on the back, together with Ortlieb panniers (I do carry some weight unfortunately as I’m traveling solo. I admire your lightweight approach…something to aspire to) I would consider them stronger than the traditional racks cyclists use as I had no problem with their strength and have been on many dirt roads and some very bad road too, while other cyclists seem to have quite some issues with their racks breaking. I used the Sport version only on a trip a couple of years ago in Patagonia and was convinced of its strength than, when I had no problems while other cyclists seemed to have issues with breaking racks on the carretera austral quite regularly. Or maybe I’m just lucky:)
Thanks for the longterm feedback Nina, much appreciated. Seems the Thule racks served you really well. My only concern was the side to side slight flex I could feel, compared to my Tubus racks. But it doesn’t sound like that was an issue for you at all. If you have a link you can send me to your bike, I’d love to see it.
Hi Nina & Cass, until now I have used my Ortlieb Bike Packer Plus on a conventional rack on a hardtail bike. For my next off-road trip in the South-west of Australia I would like to take my dual-suspension bike but keep the panniers because they are simply great: 100% waterproof, easy to handle and I can fit in heaps. I would like to use the Pack’n’Pedal on the rear. So these are my questions:
1. Is the Quicklock system compatible with the rather thick bars on each side of the rack?
2. Will the bags swing very much when riding on rocky terrain?
3. Did you use a side frame with your Ortlieb panniers?
Thank you!
Hi Jessica,
My brother & I have both used the original Freeload Rack (before they were re branded Thule) 3 times on the Munda Biddi Trail (1000 km of off road trails) in Western Australia. In that time we only had one incident with the rack, my brother picked up a thick stick that destroyed the rear derailleur & damaged one of the plastic holding brackets, we fixed it using cable ties & continued the extra 400 km to the end. No real side to side swivel from the rack, you may need to retention after a day or two & make sure you Loctite all the stainless bolts on the rack otherwise you will loose them.
I used Ortlieb bags with the optional rack side pannier supports. No problems mounting them. I did modify the lower plastic swivel holder on the bottom of the bags, replacing the holding finger with an aluminium one (far less flex & stops the pannier jumping off).
Rack mounted on rear of 2004 Cannondale Jekyll & 2015 Giant Anthem.
The last time we did the Munda Biddi was August 2016, highest recorded rainfall for 50 years! While the Ortliebs are waterproof make sure you have lightweight waterproof sacks for packing sleepinging bag & clothes just in case.
I found this rack to be less flexible between bikes as I was hoping primarily due to cable routing/mounts on the top of the seat stays of one of my bikes (disc brake line and derailleur cable). To fit with existing cable routing would require abandoning the cable mounting points to give enough room for the rack to wrap the stays where the lines ran. This lead me to take one bike not so well suited on an extended gravel route vs. the intended bike. It also did leave some permanent paint scuffs after 75miles of gravel riding as cautioned in this review.
Makes for an excellent front rack on suspension forks as well as carbon cross/road forks as well as Surly cross-check/long haul trucker forks.
I intended to avoid the cost of frame bags and have a gear platform to suit several of my bikes for prolonged touring. Although this rack seems best to replace a front roll type frame bag, which should also be as flexible between bikes, and lighter. Sigh.
Thanks for the input Eric. As you mention, I can see the racks being particularly well suited to front suspension forks, for sure.
As you say, framebag-style gear is considerably lighter, and easily transferable from bike to bike too, for the most part (sometimes drop handlebars, or a short seat post can be an issue). I do find soft bags need some TLC though, to make sure there’s no cable rub or similar.
I tried a set of these but ended up having to return them as a) they didn’t fit my bike due to the spacing of the cable stops (the rack sat crooked), and b) I found that my Ortleib panniers kept swinging into the spokes. I could have spent another $70 on the extra side frame, but was a bit cheesed off when the retailer told me that these racks were only really designed for the Thule panniers and that I could hardly expect them to work with anything else.
Pingback: A rack when you need it | Trails and Tours
Hello Mate,
just clocking your site again and noticed this rack chat.
I’ve used one for several short trips and it is best to say that it’s perfect function is on suss-forks. The Salsa rigid, taper type fork is also fine as long as you keep the bottom tension strap hard up against the brake boss before tensioning the system….to prevent it sliding down. Pretty versatile rack I guess if you only want one rack to suit several frames.
Have a jolly down south.
Peter
Hi Cass,
Is there any risk of damaging the carbon frame of my Canondale Flesh carbon bike with the Thule Pack and Pedal Sport Rack?
Thanks for your attention and hints.
Marcos
Marcos,
no issue with carbon frames or forks. But, pay attention on fitting and it will work wonderfully well. I’ve used mine on White Brothers carbon forks with no problem as the type of carbon used for the fork legs is relatively thick.
Make sure you do not over tighten the support straps as they can produce intense pressure on their small fixing footprint. Beware of paper thin seat stays.
Check that the rack is secure enough to support your panniers or cargo weight and nip up the strap tension to suit. Contrary to popular belief, this rack is not designed to take elephantine loads, so pack accordingly.
Ciao.
I’ve been commuting here in Detroit with the touring rack/commuter bag combo on my Specialized Hot Rock for a month now, and so far I’m not at all impressed with this system.
Both racks were installed by Thule trained bike mechanics at my local bike shop.
The first rack broke at the plastic strap ratcheting fixture while I was trying to snug up the straps because the rack kept slipping down and rubbing on the tire. The load I carry is light; a fleece shirt and my lunch. But it couldn’t handle even that.
The second rack slides down as well.
I’ll keep fussing with it to try and make it reliable, but I’ll probably end up putting it on the front and install a traditional bolt-on rack in back.
Update: Good news!
Last month I bought a new commuter bike, a Trek DS 8.5, and installed my Thule rack on it. No more slipping! The rack stays firmly in place, even while bombing through snow and over snow drifts to and from work every day.
I don’t know if it no longer slips because I installed it better than my bike mechanic or because my new bike’s geometry is better for the rack.
In any case, now I’m happy with the rack. I even bought a second touring rack for the front.
Do you have a picture of it on the DS8.5? I’m picking my new 8.5 up today and am curious about fitment. Thank you
Hi Steve, I threw together a quick post with a few pictures here at DetroitConservationCafe.com. The blog is currently just a rough draft of project I’m working on, but bike commuting in Metro Detroit will eventually be a regular topic.
The touring rack fits great on the DS 8.5, I even have a touring rack for the front. I ride with the Thule commuter pannier most of the time, and I had to buy the little rail extenders (only $10.00 for the set) so I could push the bag all the way back, otherwise my heel kept hitting the bag, and I have a relatively small foot for a guy.
Hope that helps.
Thanks for the help. I installed my rack this past Friday. Tomorrow will be my first chance to commute to work. It’s 8.5mi each way 40% nasty dirt/limestone road and 60% pavement. I don’t have the panniers yet. I’ll be rolling with a kayaking dry sack strapped to the top until I need more space.
Ken,
Saw your pictures of your rack on your website, thanks for posting those. I’m looking to set my bike up similarly with the pack n pedal rack with similar bag from thule. I was looking at the reviews on various online stores (amazon, REI, etc) and noticed on amazon that there was one that said his mounting hardware completely failed after 2-3 months. How long have you been using the pannier and how is it holding up? Thanks!
Mark
Hey Mark,
After a year of using the rack, the commuter pannier and the trunk for my daily commuting, I can honestly say that the only thing special about this system is the mounting mechanism on the panniers. Everything else you would do far better with other brands. The caveat being that another rack will fit on your bike.
Here are my issues with the system.
The Rear Touring Rack
The rack itself is $100.00. But you will need the rail extenders or else your heels will kick your panniers, so that’s $10.00. Then you will need the plastic side frames to hold the panniers in place, that’s $20.00. Then you will need the magnet to keep the pannier from slapping against the frame when you go over the slightest bump, $20.00. So really, the rack’s actual cost is $150.00. The plastic housings on the strap ratcheting device break easily. The friction they provide is not really enough to keep the rack from sliding down the tube, so it will slide.
The Trunk
This $79.00 trunk is like a Volvo — boxy, but safe. Sort of. You can put a bunch of crap in it and the Velcro straps that hold it down are great. The plastic, opaque pouch that’s designed to hold your rear blinky light, is excellent at ejecting said blinky light out of the pouch and into the street. I’d lost two $45.00 LED rear lights out of it before I wizened up. Besides, the pouch is smoky colored, and it significantly reduces your light’s illumination. Great for the quiet bike paths of Amsterdam, but lousy for the psychos driving American roads who’d rather text than watch the road. Then there is the flooding problem. Yes, flooding. If you get caught in a storm without your trunk’s waterproof cover (sold separately), then you will find about an inch of water in the bottom after a few minutes. That nifty open pocket they put on the side, the one large enough to hold a stick of gum, or the blinky light holder, funnel water right into the trunk. So don’t be fooled by the impressive, dry bag style roll top, because it’s just for show.
The best thing about the whole system is the mounting mechanism that rolls back into the bag for a smooth sided pannier that won’t snag your clothes. It really is a nifty system. My bag is installed and removed around six times a day, five days a week for over a year, and it still keeps on working fine.
My advice is to buy a $30.00 rack from your LBS, and then buy the commuter pannier. You’ll save a bunch of money and frustration that way.
Finally, my new commuting bike is a 2012 Surly, Pugsley, Neck Romancer fat bike. I put a Surly Nice Rack on it and will keep the Thule commuter bag. The rest of the Pack n Pedal system I’m selling along with my previous commuter bike, the 2014 Trek Dual Sport 8.5.
Whew. There, I feel better getting all that out!
Looks like the ideal solution to my wife’s 29er – being 5’7″ it is a tiny 13″ frame and she has a Thudbuster seatpost precluding a seat bag or traditional rack (unless it had 4foot stays at the top!)
This would strap on out the way of the seatpost, and avoiding the disc caliper allowing a 15L dry bag to strap on the top and not hit the seatpost.
Maybe a fatbike version could be offered with just a wider deck? Either Thule or an aftermarket / home made?
Thanks for the ongoing comments and feedback on these racks. It’s always good to hear other people’s input.
I didn’t have any slippage issues myself, but it did take a bit of practise to get the right technique. The guys at Thule said there shouldn’t be any issues with carbon frames.
I just noticed these today while online. I plan the install on a Trek Madone 3.1 [carbon frame]. like anything else… finesse is the key when installing anything onto carbon. MY QUESTION? Does anyone know when & where I can find & purchase the Thule trunk bag for this rack? They are Not readily available as of 3-5-14… Please advise…
Trying to find out of these racks have enough clearance to fit my full suspension Specialized Camber 29r – is it tall enough? Thule is giving me differing answers, and it’s an expensive purchase…
I have the rack installed. Anyway to post pics on this thread?
Not sure that there is with WordPress. Sorry!
Hey Brad, how’d it go installing it on the carbon frame? Thinking of doing the same, but concerned about crushing the seat stays (Madone as well). Any slippage of the rack on the stays? Were you able to cinch the straps down tight enough?
Works great. Adds a buttload of weight on back of bike. Once you torque all 4 ratchet connectors maybe 1-2 clicks, all 4 will hold rack in place. Bag straps on great. Email me bradwallace60@gmail.com I’ll send you pics.
Just a follow up on a question that I had earlier. We went ahead and purchased two of these systems mostly because we had no other choice-I am riding a full suspension 29r , and my husband has a full carbon hardtail mountain bike but we wanted to put panniers on them, so this was our only option. There is definitely some tweaking involved. On my husband’s carbon mountain bike of the weight of the panniers definitely let the whole system slip down until the part over the tire was rubbing the tire. Not a great way to start the trip and we had to unload, loosen, move up, and then really crank on the straps to keep everything in place. We are still not sure that we will not eventually do some damage with as tightly as we have this rack mounted on those stays. On my bike my stays are so low and horizontal that I have very little tire clearance as well and have to slide the rack much closer to my seat than I would like. This means that I occasionally have some heel strike although I just saw that I can buy some extenders. One other issue that we did not take into account during purchase was weight-the system is incredibly heavy. I can hardly pick my bike up when fully loaded (I can pedal it, but have lots of trouble just maneuvering it around by hand and/or finding something substantial enough to lean it against so it does not knock things over!) Maybe this is a part of self-supported touring that I am just not used to 🙂 Overall, the system seems to be working okay-our longest trip so far was a three-day journey on some singletrack but mostly dirt roads; we leave tomorrow for a 12 day tour on the Lewis and Clark Trail. Keeping our fingers crossed that everything stays put and all goes well.
Kim,
They do indeed fit different bikes “differently” I have not loaded as much as you and have had no slippage or movement. I had mine on my road bike for a few months, thought it was always going to be attached… I have had mine off since May of this year… I will use it again if I go on a long ride… So, since I own it, i”ll keep it, use it if needed… right now its on a basement shelf, filled with bike parts…
Do you know if the Side Frames are needed to add the Ortlieb Front and Back rollers to the touring rack?
I believe so.
Greg, you definitely want the side frams as well as the small rail extenders that screw into the top rail. The rail extenders only cost about $10.00.
I’ve been using my Pack n’ Pedal racks five days a week for commuting for over a year now, and I’m pretty happy with them. However, they are not better than a solid rack by any means, at least for touring. I’ll be buying the Ortleibs as well for light touring.
I’ve bought mine 5 years ago (freeload) together with the side frames. Firs I used them in the rear of my fully, next as front system on my 29er, and I just mounted it in the rear of my eBike. I use Vaude bags on both sides, from day commuting to monthlong trips all over Europe. All I can say is that this system is absolutely perfect. Whatever I want to transport can be transported (including a broken bike of my 6-year old son while on tour), with the plate design it even keeps dirt away from me, and I really love it!!! Regarding the key for dismounting: if lost, use a small-blade skrewdriver. Take a good light and look inside, and you’ll see what you have to push sideways. Only thing I fear here in Germany is that it might be stolen one day…….
I have this rack, but went through the trouble to order it from new zealand.
We did ~215 miles over 7 days in the san juan hut to hut trip. 2 bikes. 2 racks, rear mounted. Never a wiggle/wobble/rattle/squeak/etc.
I plan to purchase a Specialized Sirrus Elite Carbon Disc. It does not come with screw holes near the seat to add a normal rack. Can anyone comment on weather this rack would be a good fit for this carbon bike?
Thanks in advance for your input.